
This is how you start with MyAnonMail. The complete privacy combination — your own @brainfusion.nl email address, anonymous aliases and your own Password Manager — in a few guided steps. You don’t have to be a technician; we will set it up together with you.
You order yourself, we will prepare it. Pay via shop (€7.50 per month) and you will receive directly by email your login details — mailbox, aliases and vault. Below you will walk through the installation step by step.
The steps
1. Your new mailbox
You log in to webmail (mail.brainfusion.nl) with your new one @brainfusion.nl-address. No email program required — it works right in your browser.
2. Your own safe
With your login details you set up a strong master password in (a sentence of 4–5 words). Only you know it — we can never see it. Keep it safe.
3. The vault in your browser
You install the Bitwarden extension and put it on our own server (vault.brainfusion.nl). From now on, your vault will fill in passwords automatically.
4. Aliases to the vault
Connect once with a key, and from now on you can manage your safe yourself generate aliases on @alias.brainfusion.nl.
5. Daily use
Are you registering somewhere? In the email field generate an alias, in the password field a strong password — and you save it. Finished.
6. Login & replies
Log in later? Your safe fills in automatically — don’t copy anything. And replying to emails is going back as the alias.
Step by step — with images
Below you’ll walk through the entire combo once — with a screenshot of each step. Take your time; you don’t have to be a technician.
Step 0 — Prepare your browser (one time)
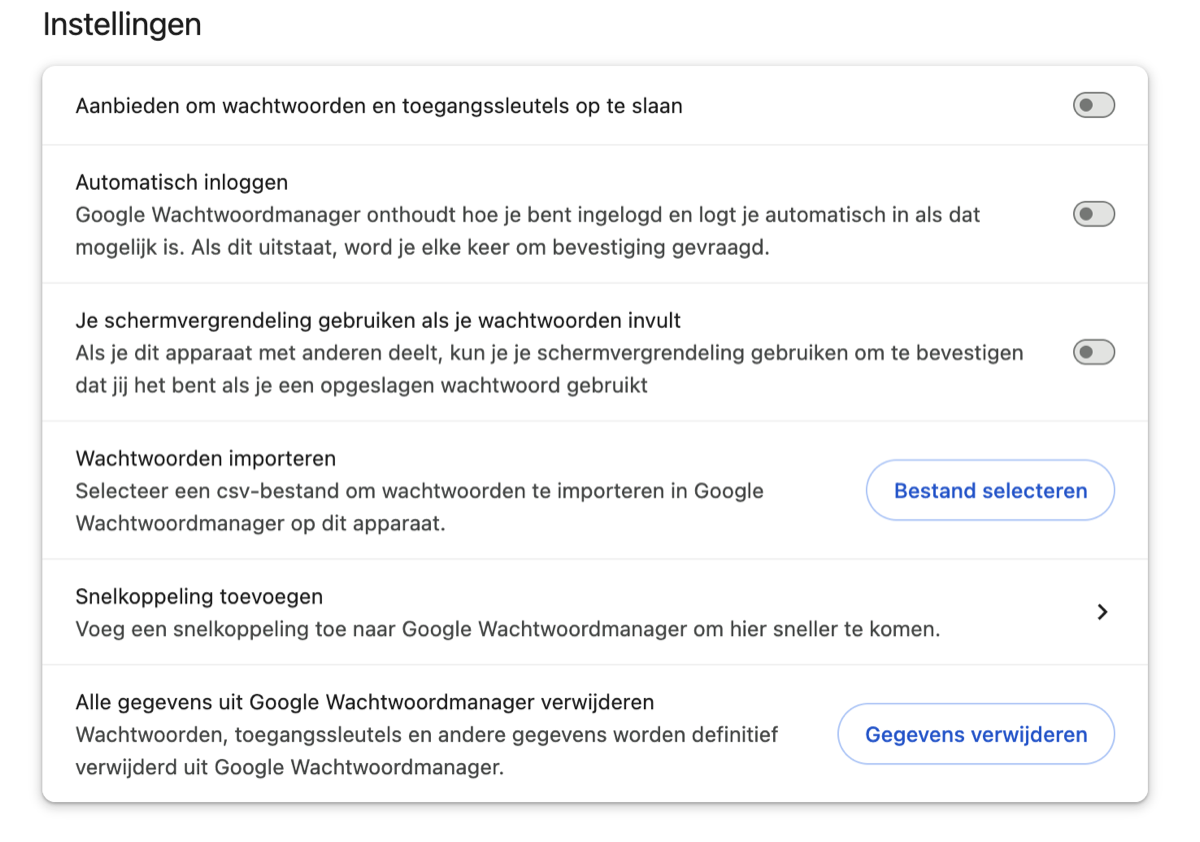
Put first turn off your browser’s built-in password manager. Then you won’t get any “save password?” popups, and you will be… safe immediately the only place where passwords are stored. In Chrome: open chrome://password-manager/settings and disable “Offer to save passwords…” and “Automatic login”.
Step 1 — Log in to webmail
Open the email with your login details, copy your first password, go to https://mail.brainfusion.nl, enter your @brainfusion.nl address + password and click Login. (Copy → paste immediately; nothing in between.)
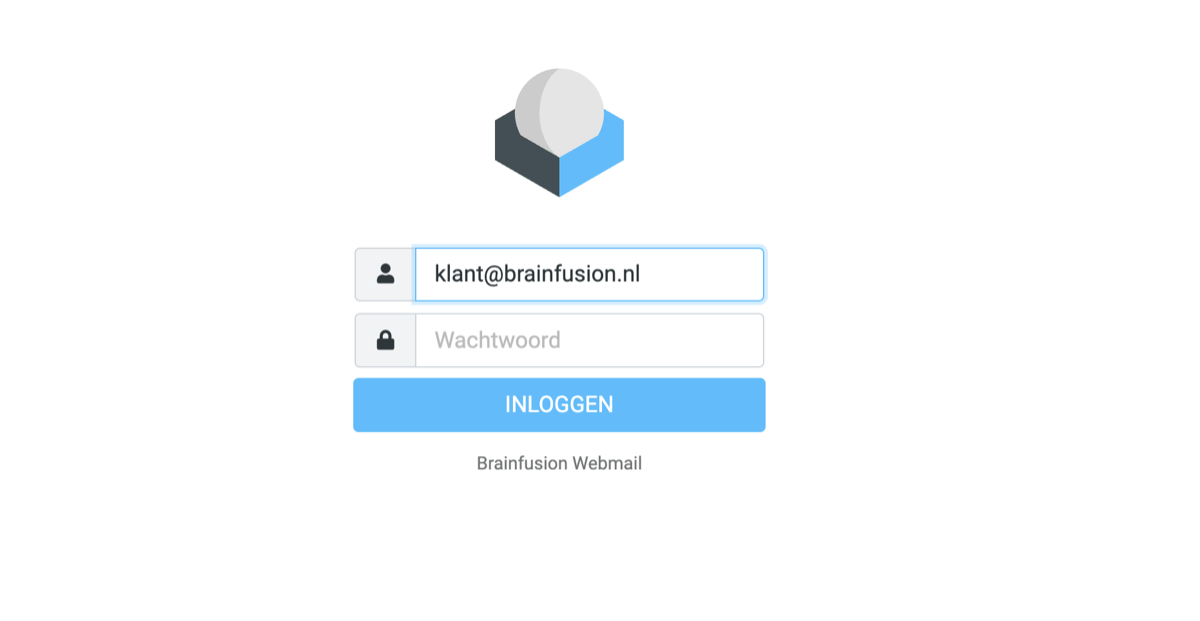
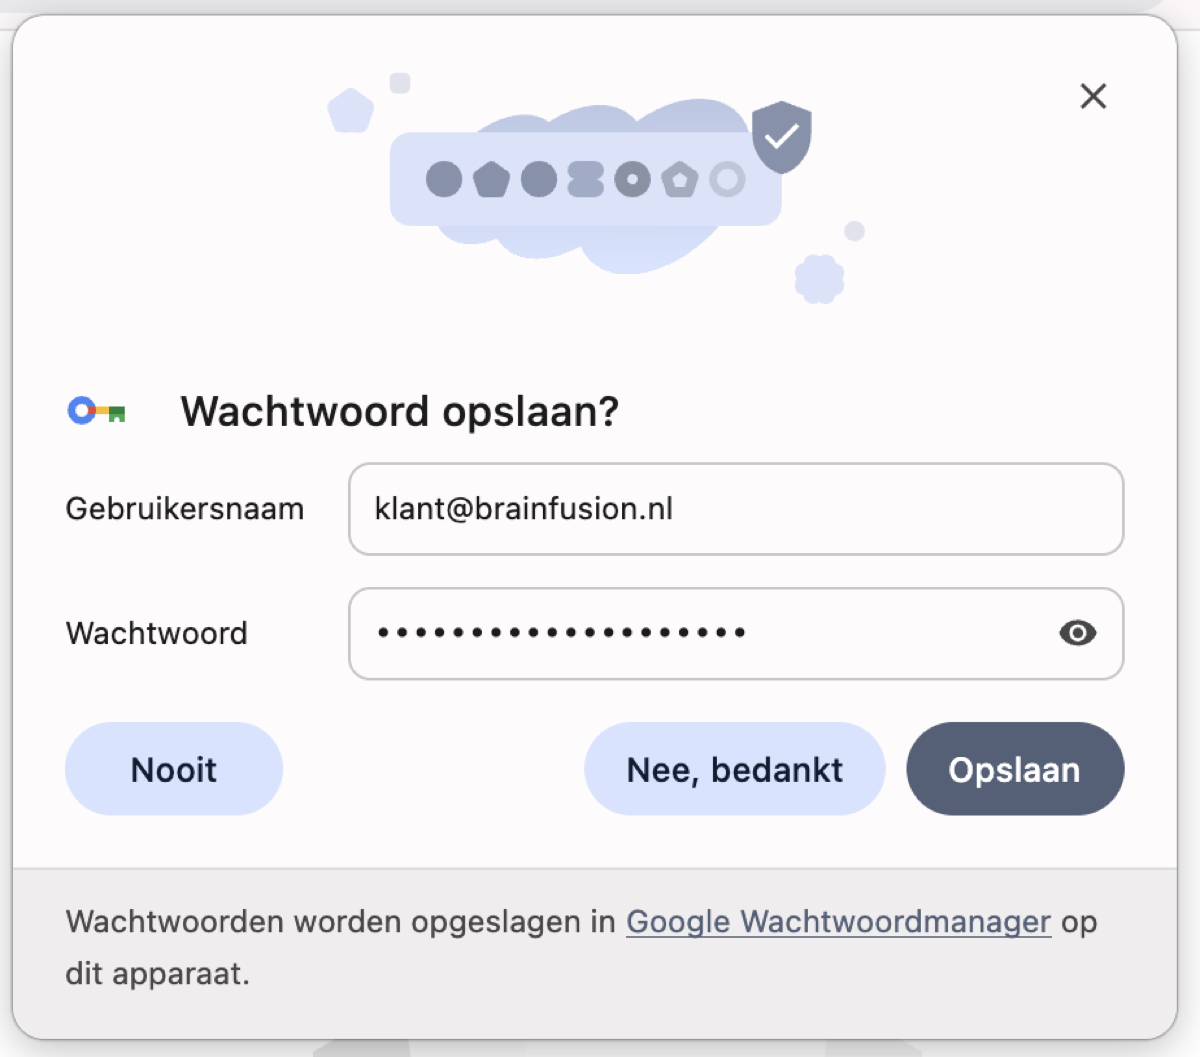
If you did Step 0, your browser will not ask anything here. Do you still see a “Save password?” pop-up → click No. Your passwords belong in your own safe.
Step 2 — Activate your vault + choose master password
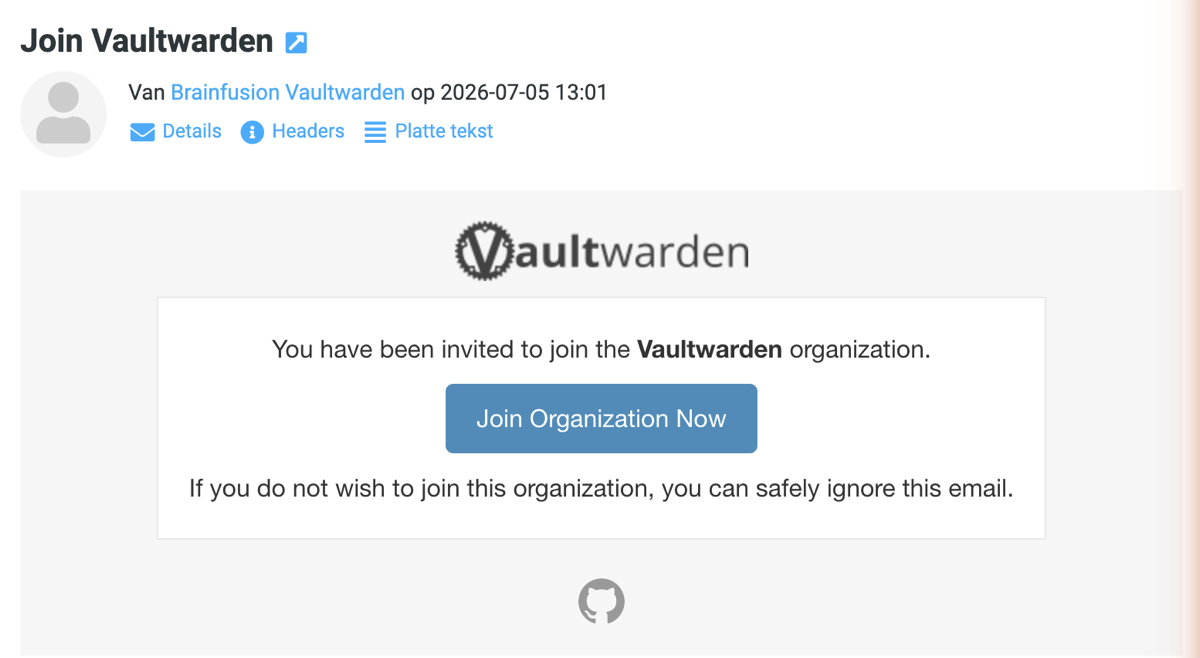
The email “Join Vaultwarden” will appear in your inbox. Open it and click “Join Organization Now”.
Now choose you master password: a sentence of 4–5 words that you remember but no one guesses. Also set a hint and confirm.
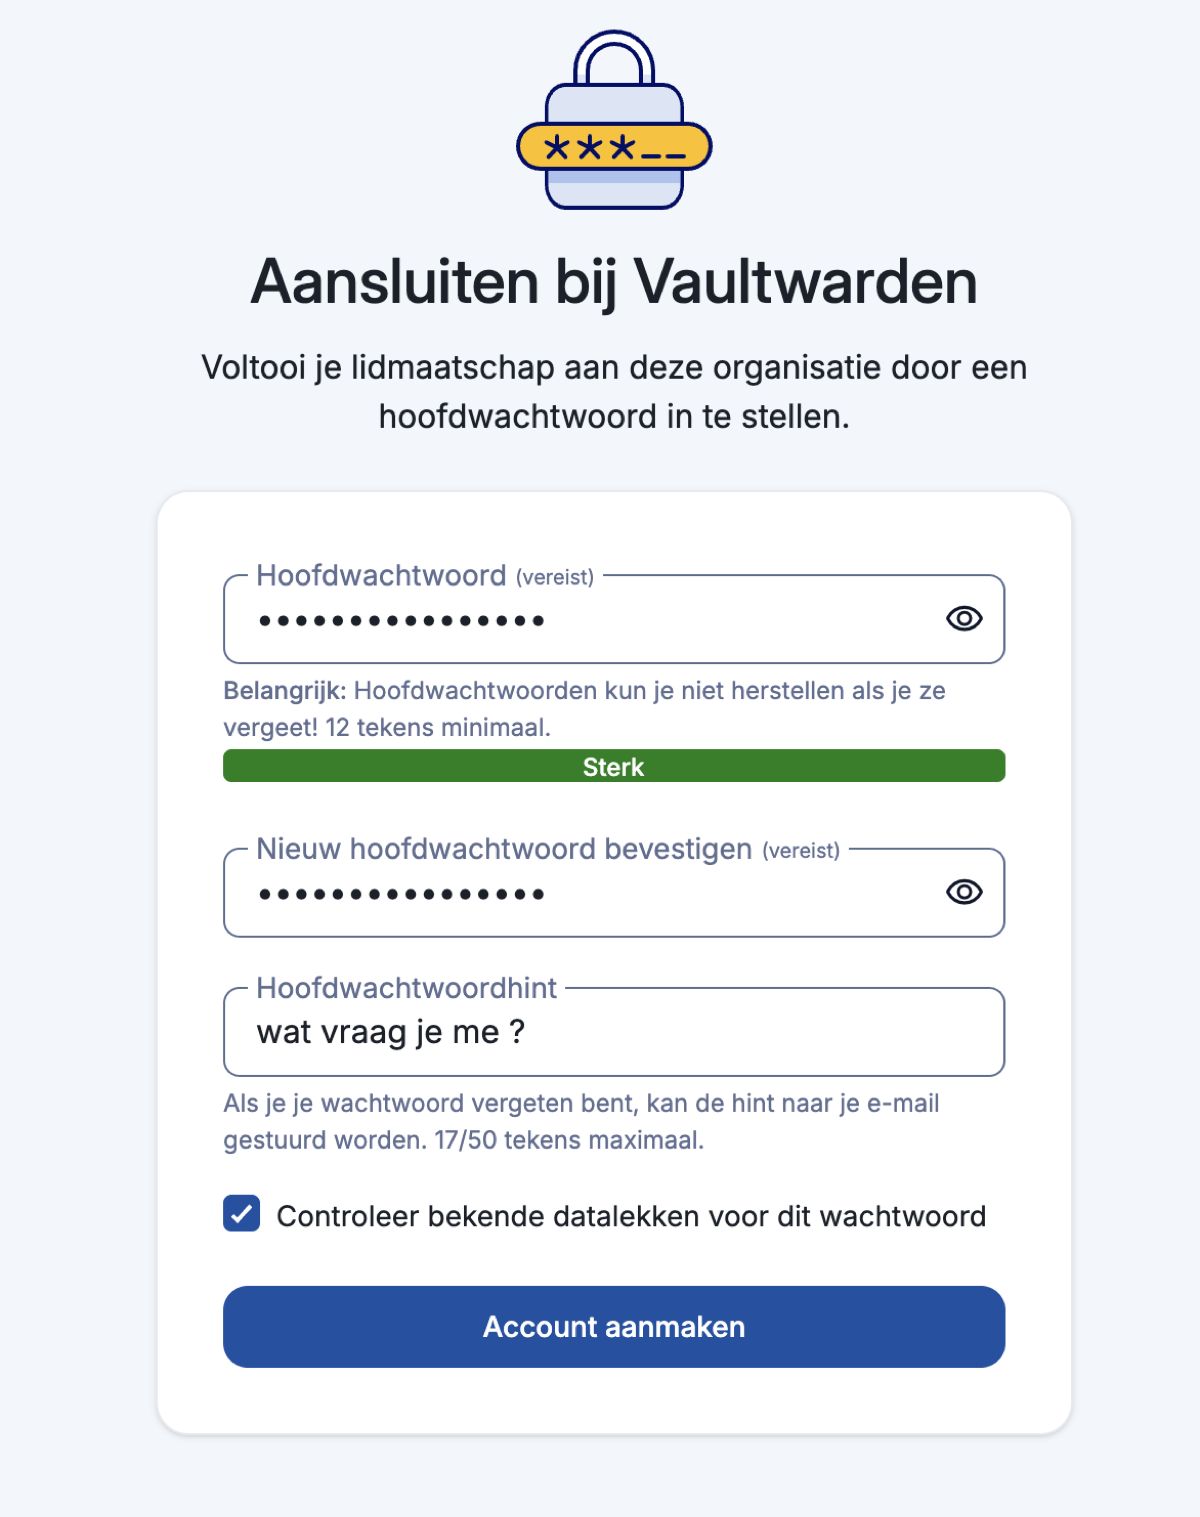
⚠️ Important: Brainfusion can be your master password do not reset. If you forget, your safe is gone. Remember the phrase, don’t store it digitally anywhere. (Safety net = an encrypted backup later, see below.)
Step 3 — Install the Bitwarden extension
After creating your vault, you will be taken to a page that asks you to install the browser extension.
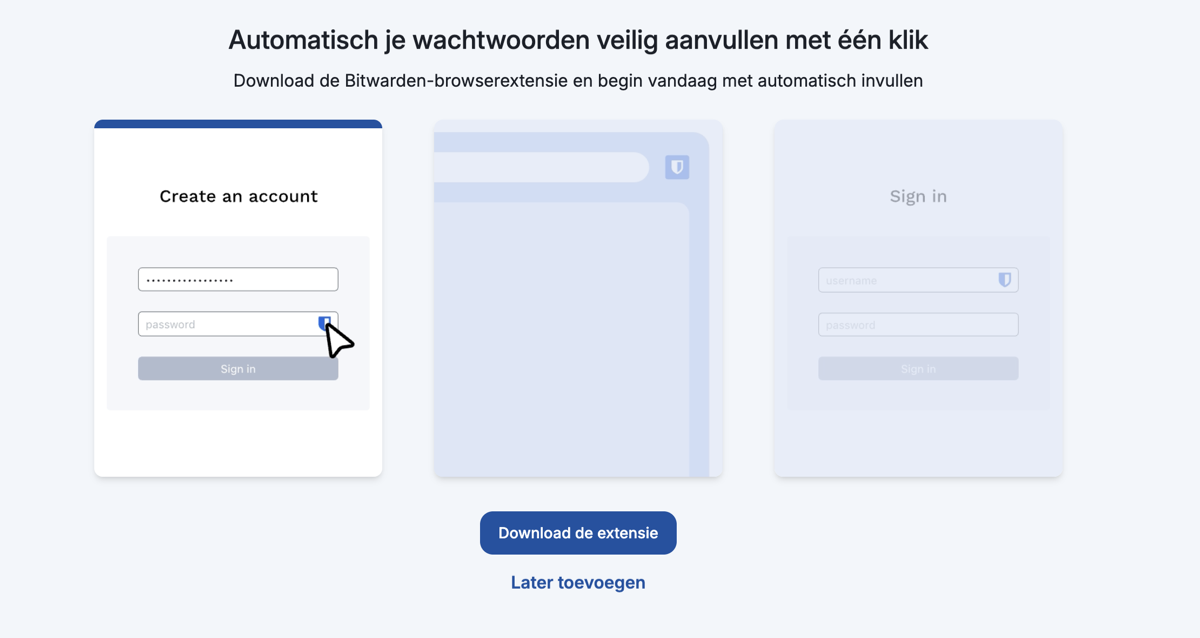
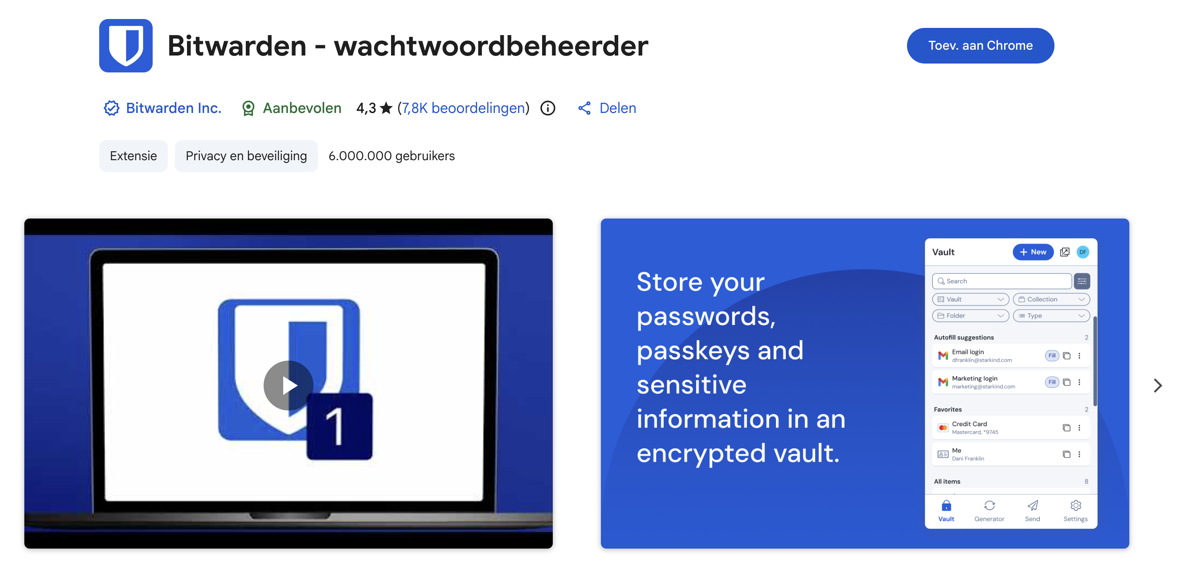
Install the Bitwarden extension (no Google account needed — skip). Secure it (pin).
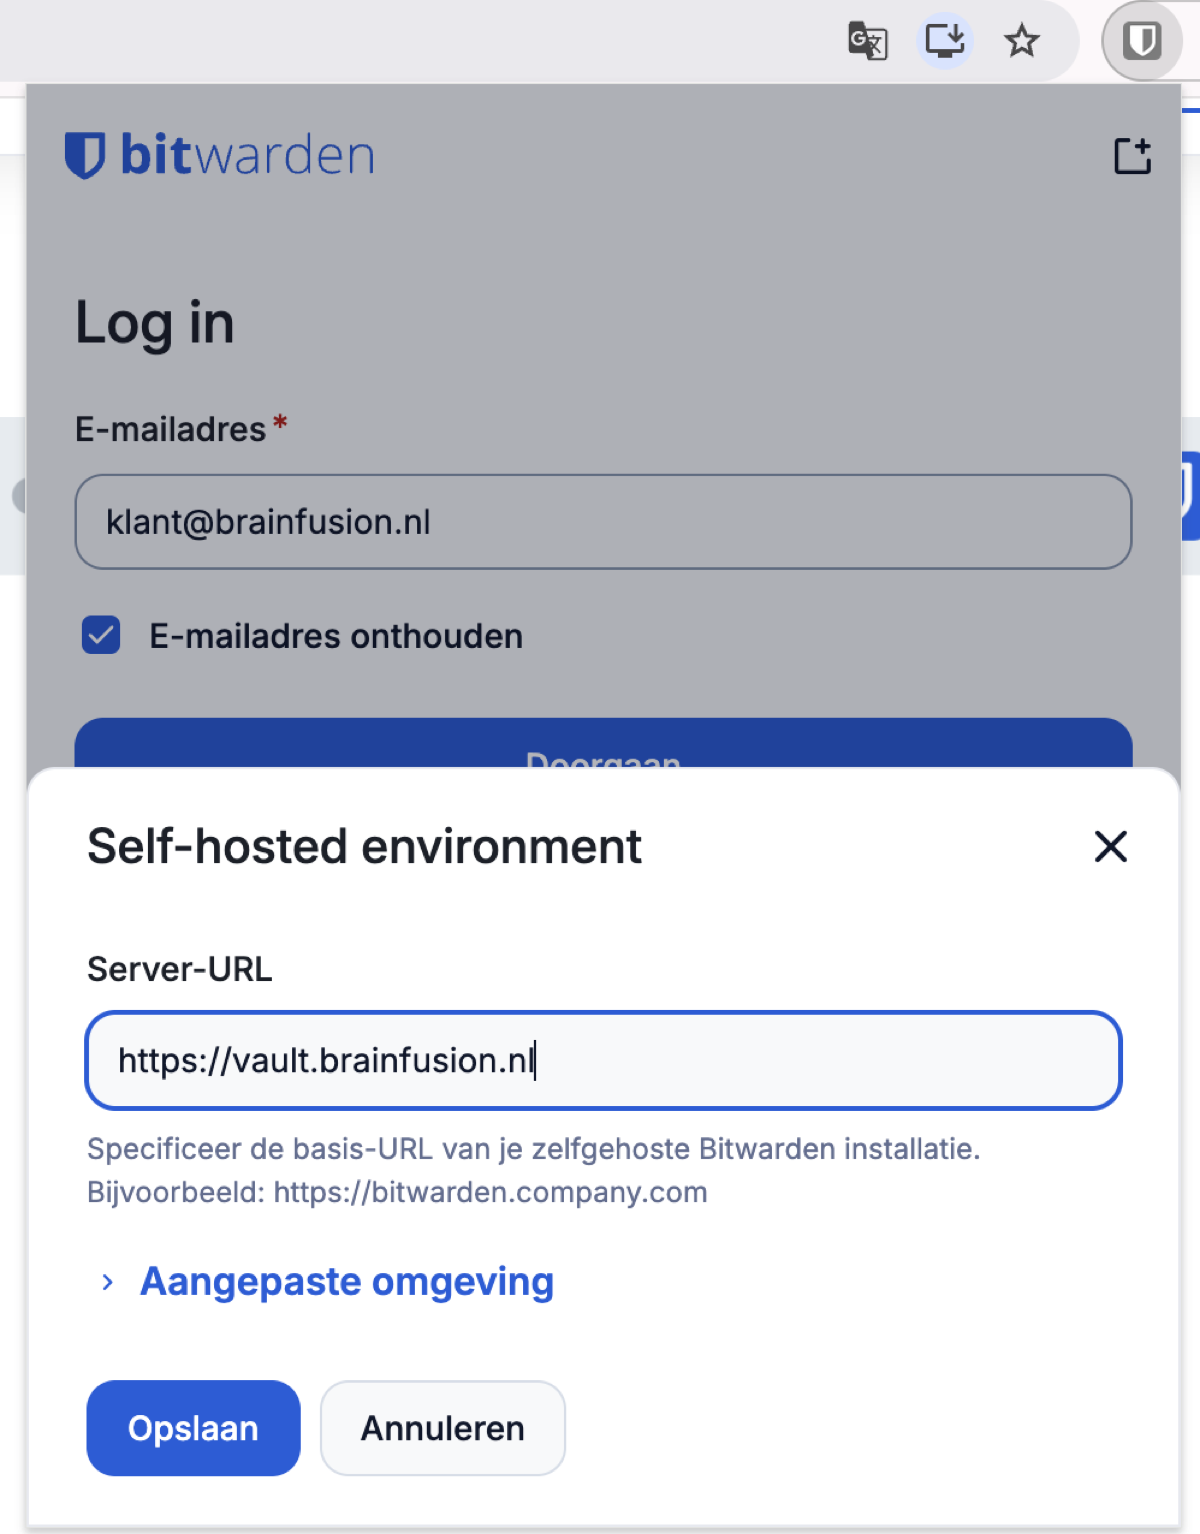
Before you log in: set the server to self-hosted https://vault.brainfusion.nl. Then log in with your email address + master password.
Step 4 — One vault as source
Your browser password manager is already disabled (Step 0), so your vault is now the only source. Bitwarden asks “import existing passwords?” and you start with nothing → skip. (Coming from another manager? See Switch at the bottom — you do that consciously, not now.)
Step 5 — Enable anonymous aliases (the link)
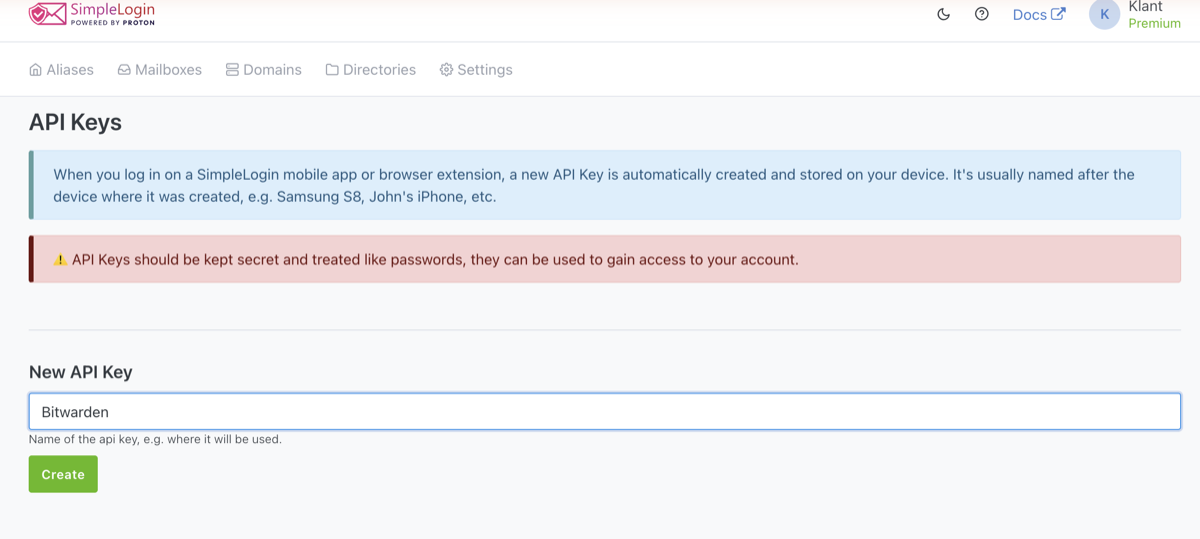
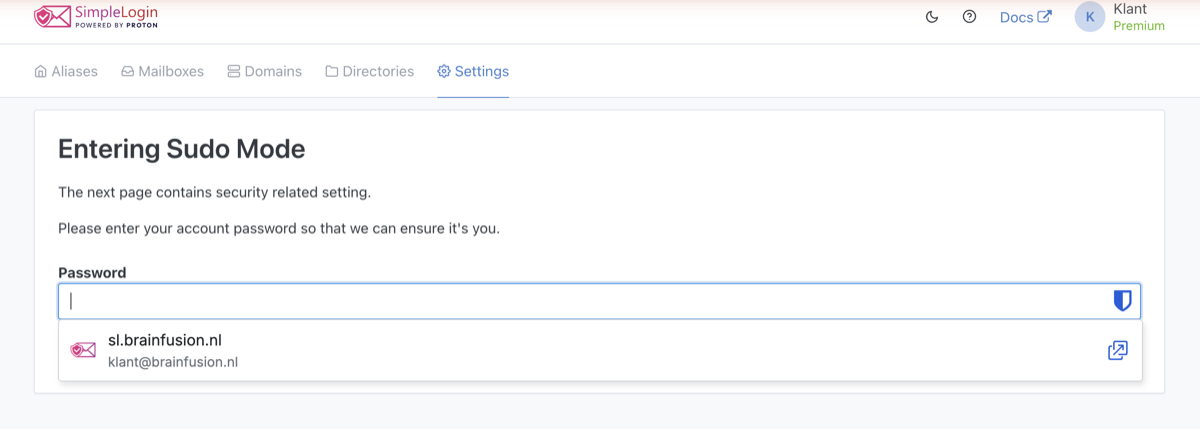
Log in once https://sl.brainfusion.nl → Settings → API keys → create an API key. (SimpleLogin will ask for your password one more time — “sudo mode” — that’s normal.)
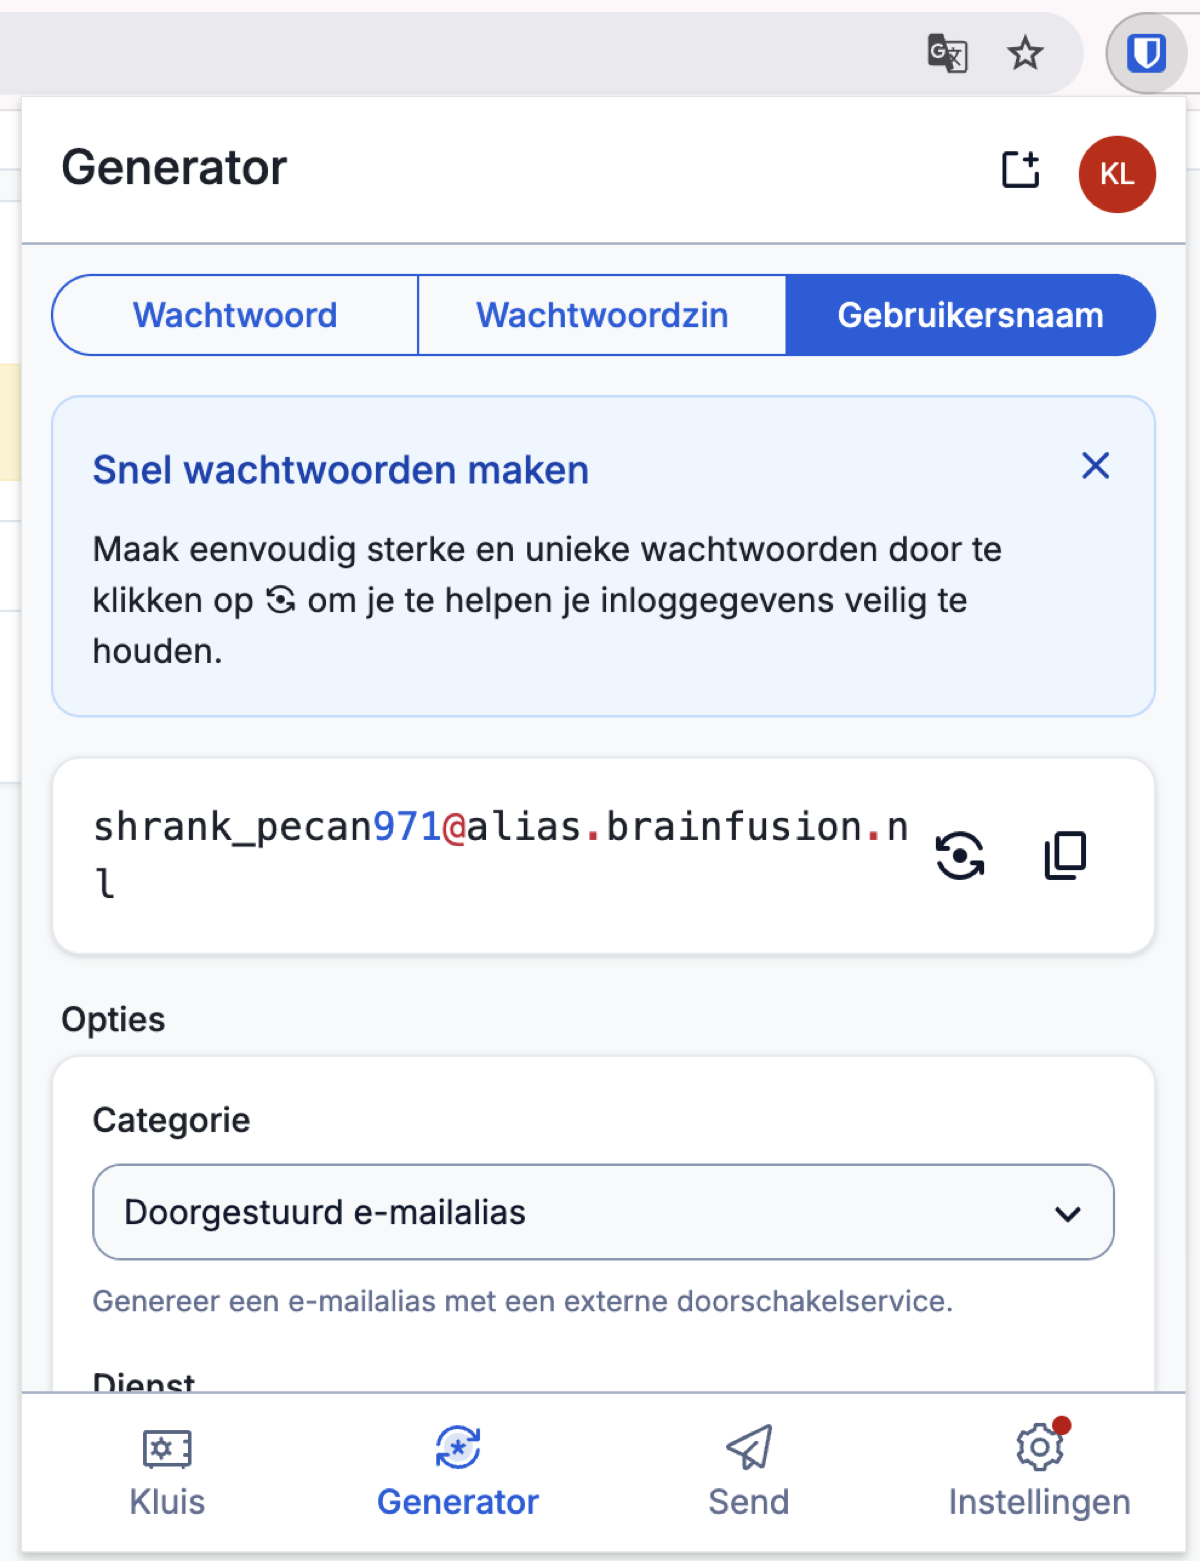
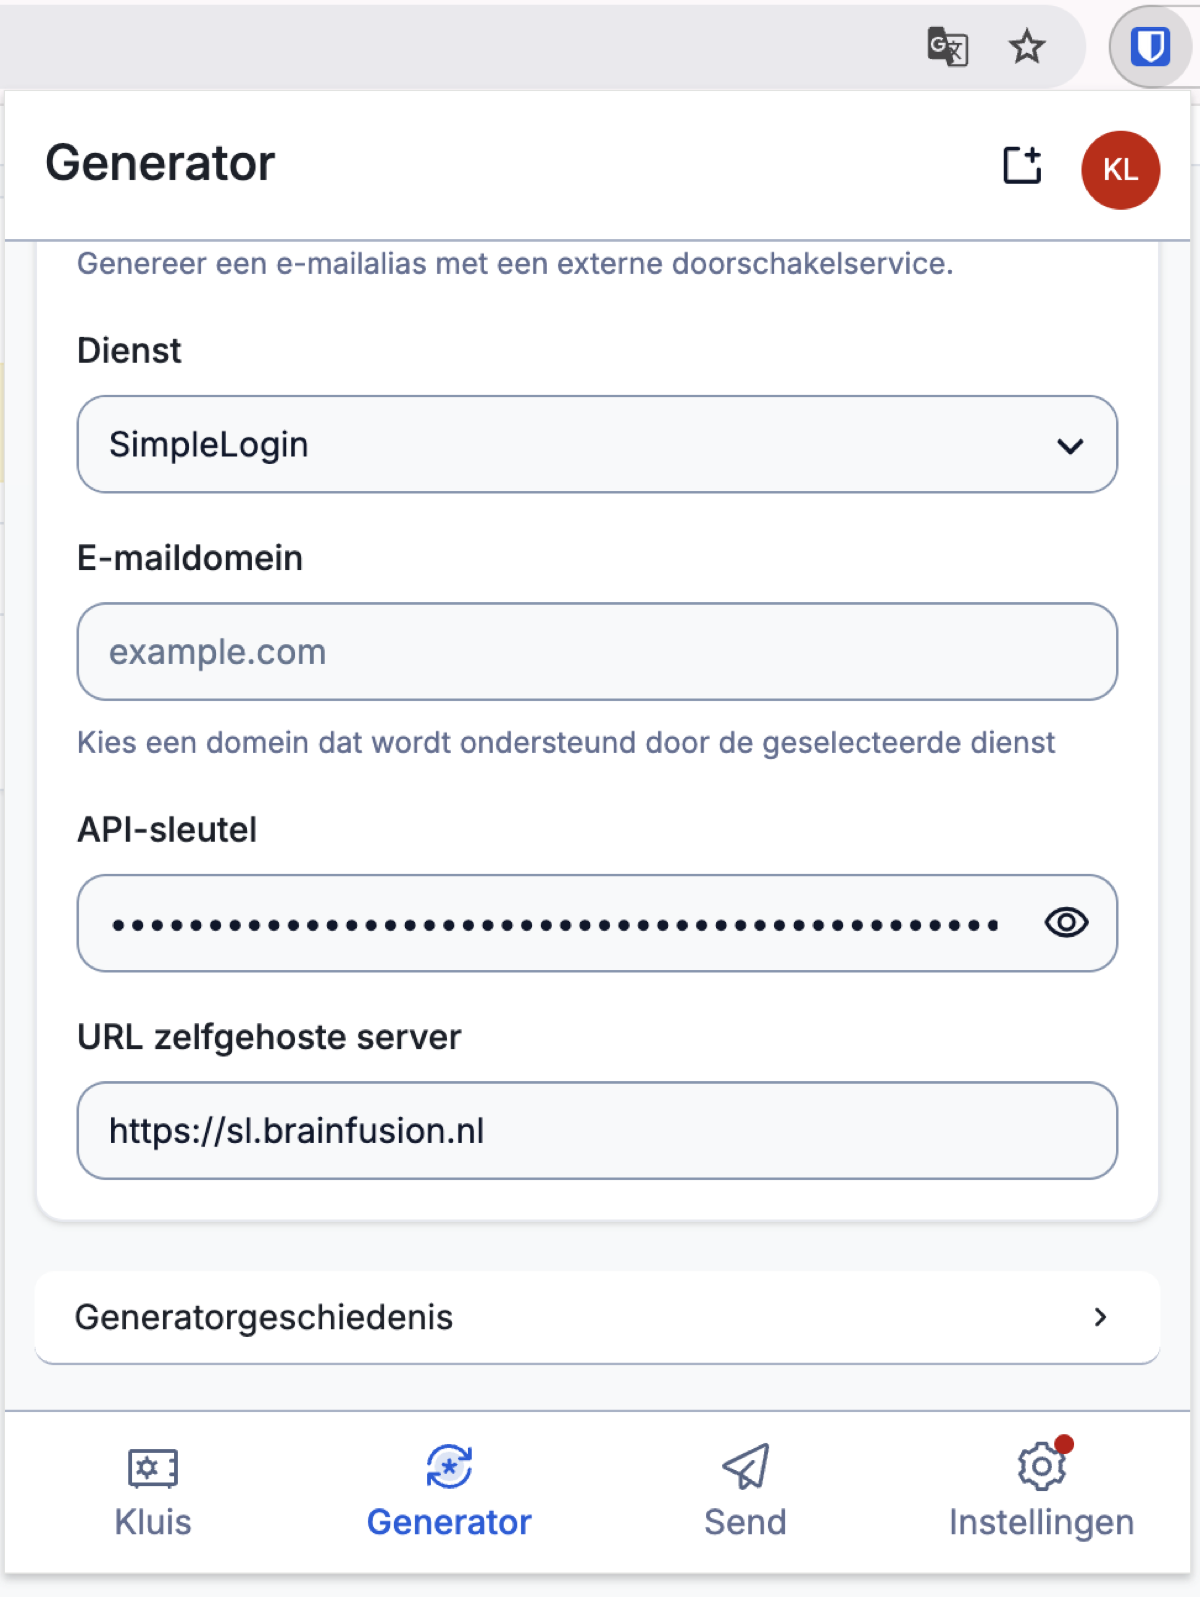
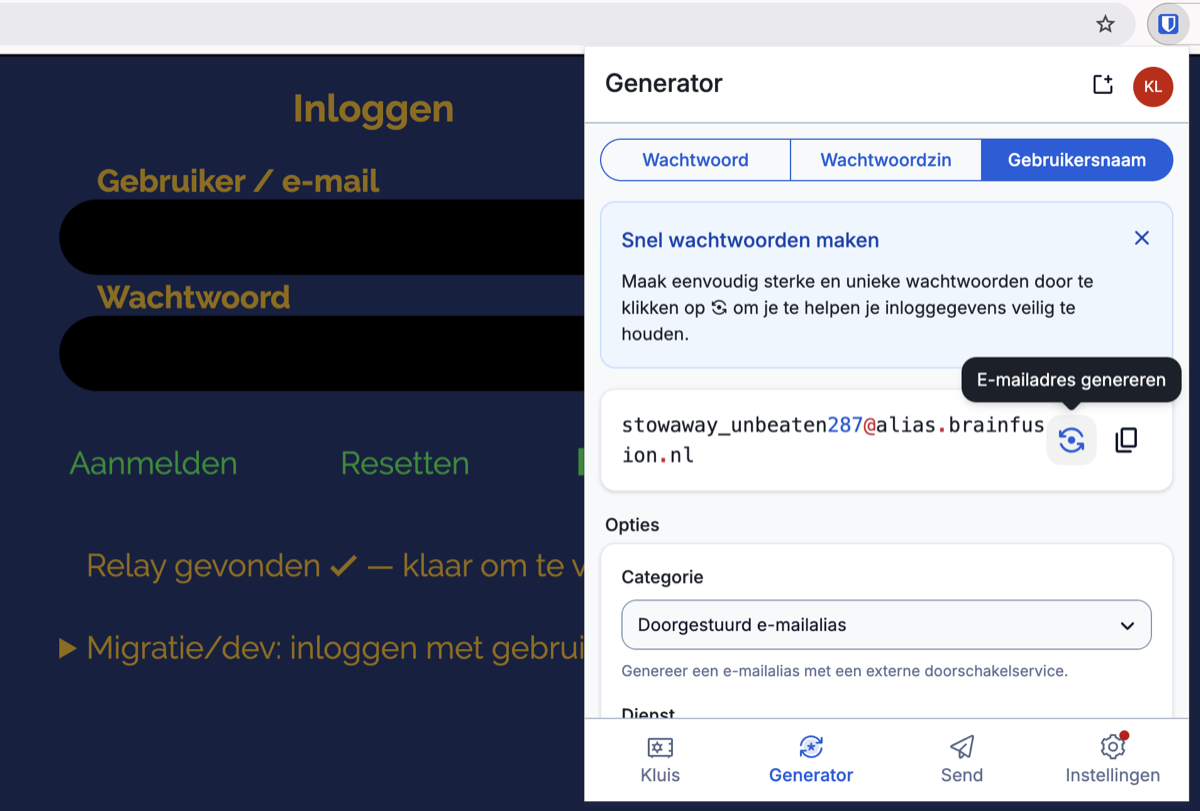
Open the Bitwarden extension → Generator and choose at the top Username. Set: Category = “Forwarded Email Alias”, Service = “SimpleLogin”, Self-hosted Server URL = https://sl.brainfusion.nl, and paste your API key last. Click ↻ → an alias will appear at @alias.brainfusion.nl.
Step 5a — Add the SimpleLogin extension (optional)
📌 By popular request. You just remain the Bitwarden extension use — it generates your aliases just fine. But you can now have a separate one SimpleLogin extension put next to. Useful if you are aware recognizable want to create aliases (e.g. bol-com-jul25@alias.brainfusion.nl instead of a random sequence).
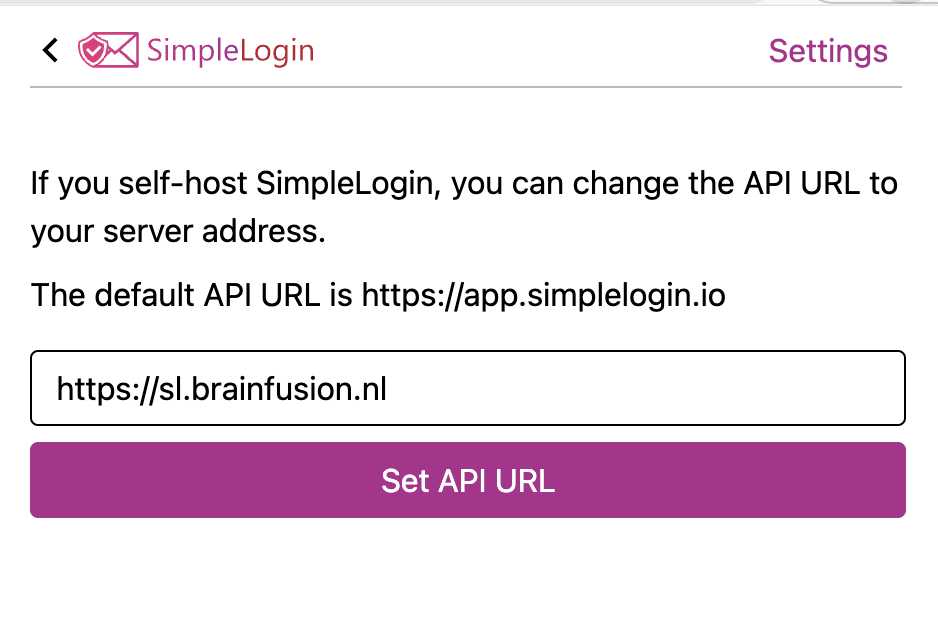
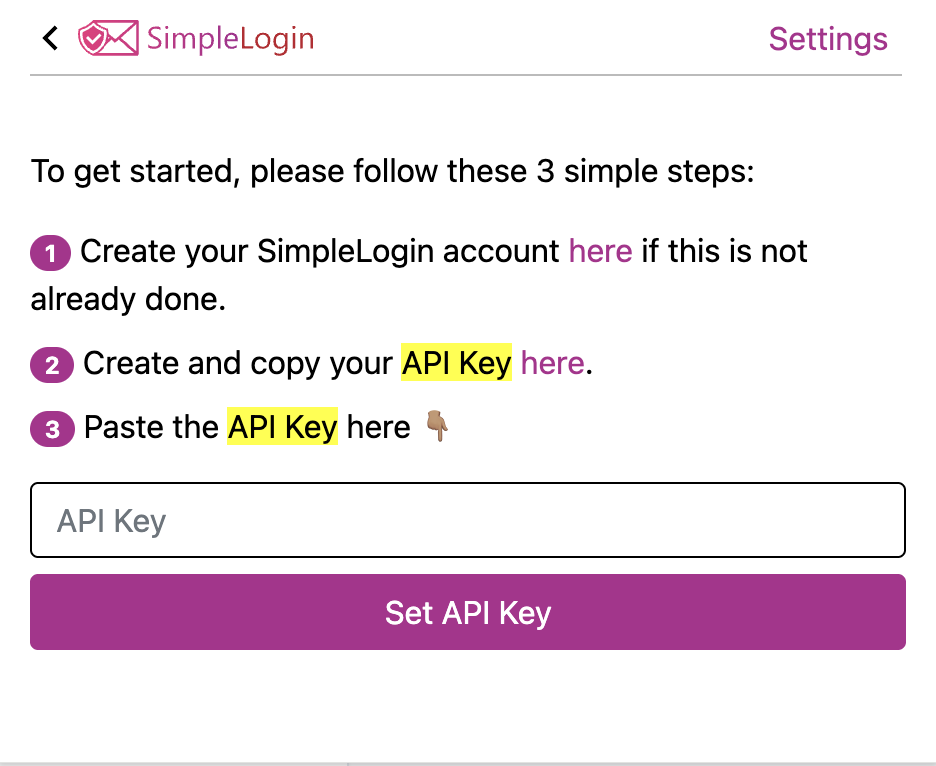
Install the SimpleLogin extension (red icon, often via Proton) and pin it. Open the extension → Settings and fill in the API URL https://sl.brainfusion.nl in (that was standard app.simplelogin.io) → click Set API URL.
Back to the main screen → select Sign in with API Key → paste your API key → Set. The extension now immediately shows you sl.brainfusion.nlenvironment in miniature.
Step 5b — Create recognizable aliases per website
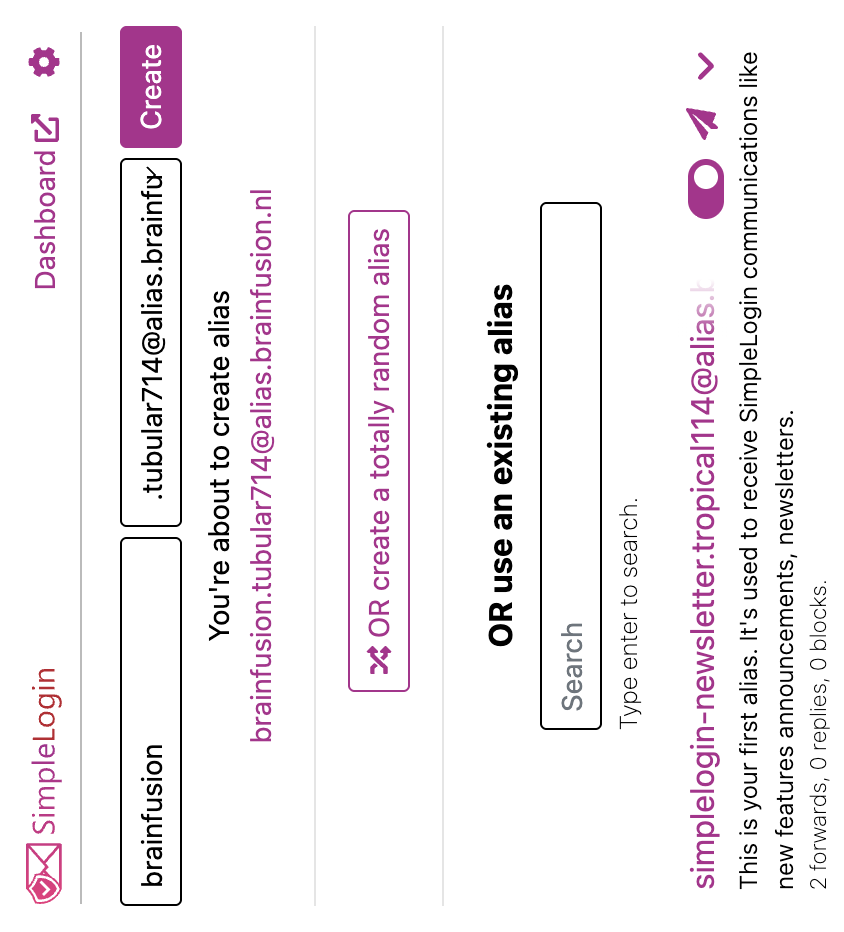
With the SimpleLogin extension you can create one in just a few clicks legible alias that you will recognize later.
- Open the SimpleLogin extension on the page where you sign up.
- The extension usually already represents a domain — adjust the name (only lowercase letters, numbers, periods, dashes and underscores; below the field it warns in red if something is not allowed).
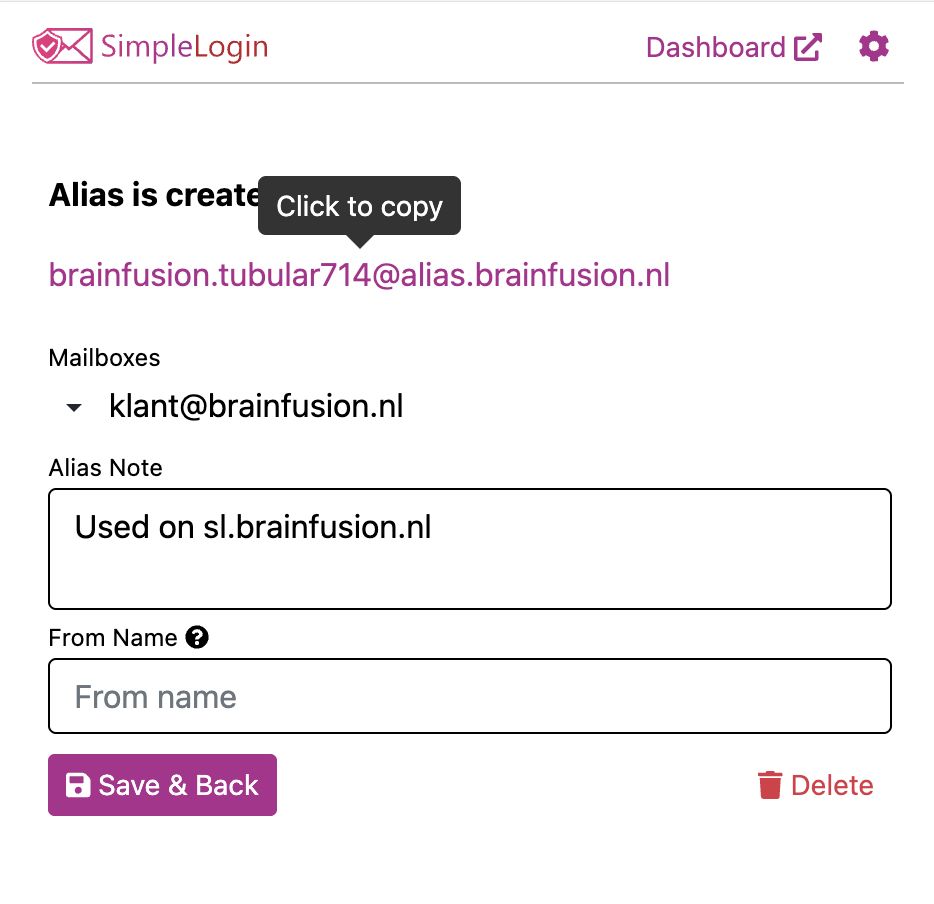
- Click Create → you get “Alias is created”. Click Click to copy to copy the alias (adding a name/label is allowed, but not necessary).
- Paste the alias into it email field; at the password fieldlet your Bitwarden generate a strong password.
⚠️ Save only once. Just like with the Bitwarden generator: on subsequent pages, “Save login” again = click away (×), otherwise you will get duplicate items in your vault.
Step 6 — Daily Use
Register for a service — open the Bitwarden extension (shield at top right) → Generator:
- Choose Username → click ↻ for a fresh alias → Copy → paste into the email field.
- Switch to Password → click ↻ for a strong password → Copy → paste into the password field.
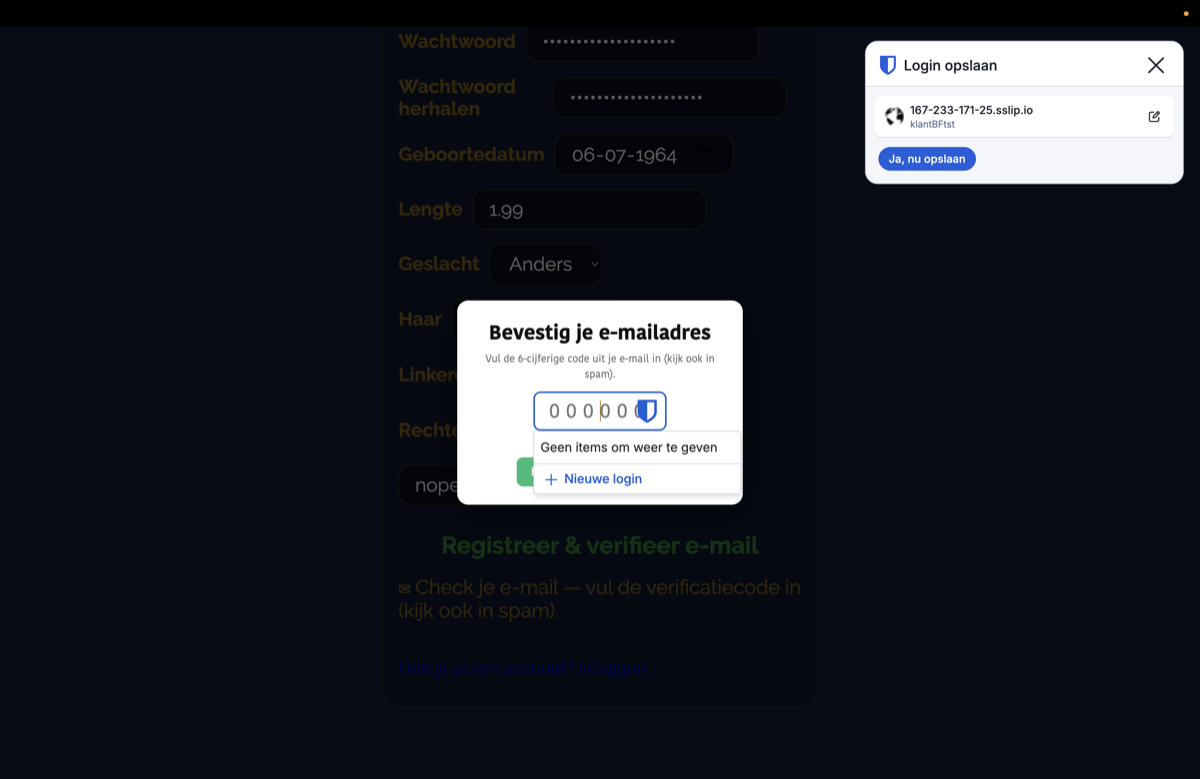
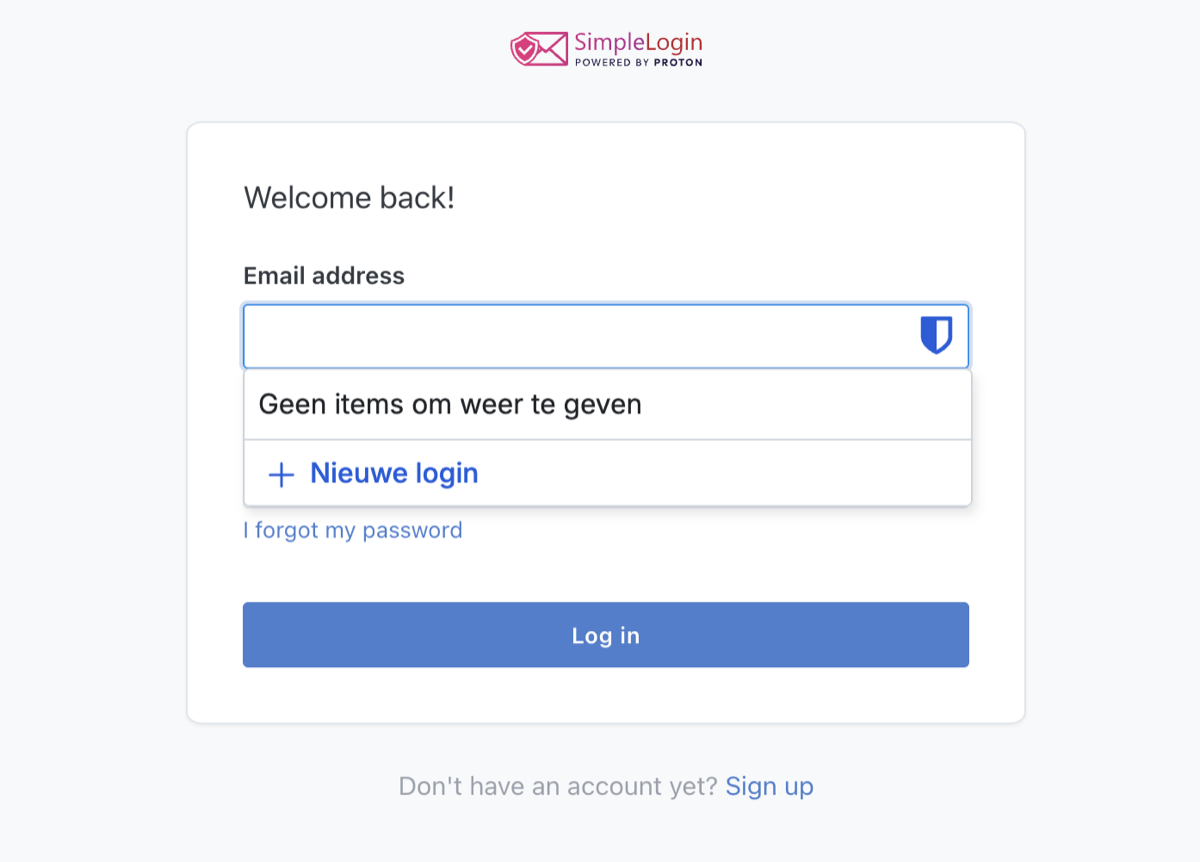
Note: the inline menu on the field only shows “no items to display” + “+ new login” — you don’t generate anything there. You create an alias and password in the Generator.
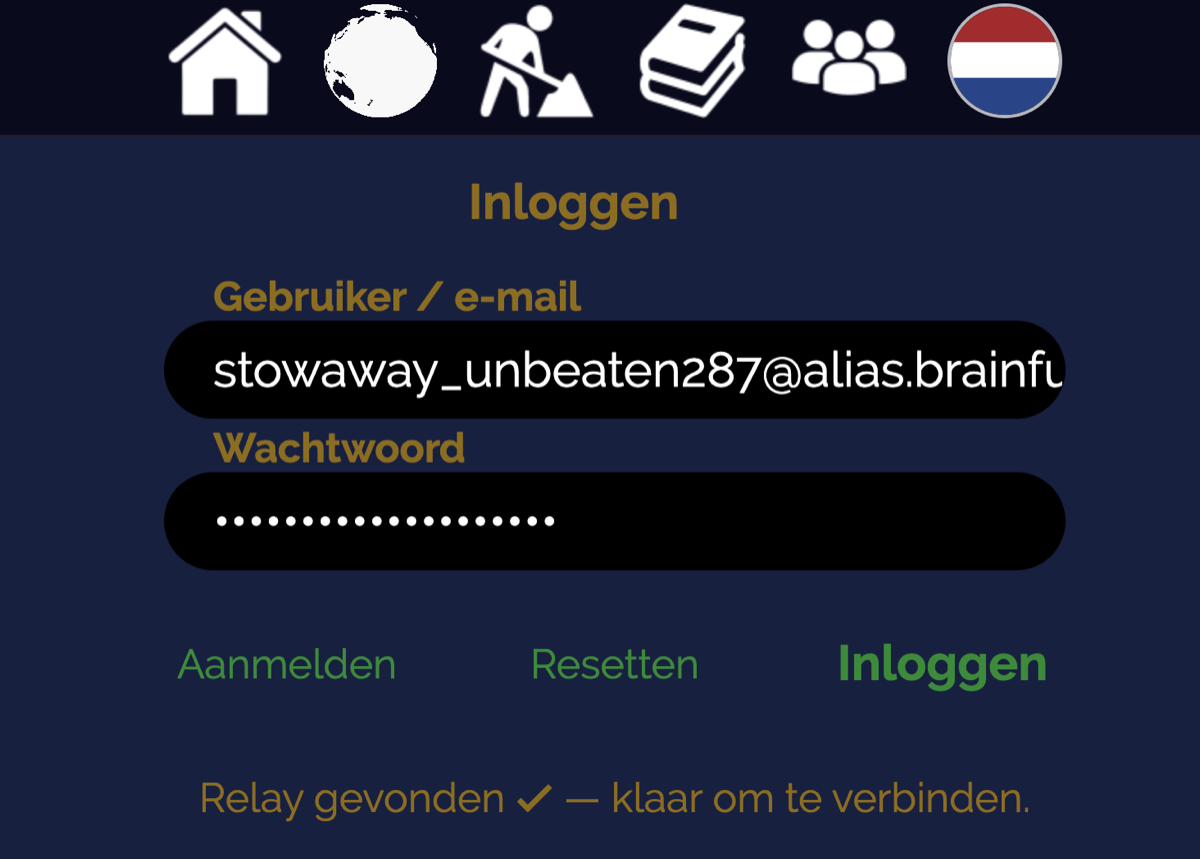
Send the form → Bitwarden asks at the top right “Save this login?” → Yes. Now your alias and password are in your safe and it will fill in everything automatically next time.
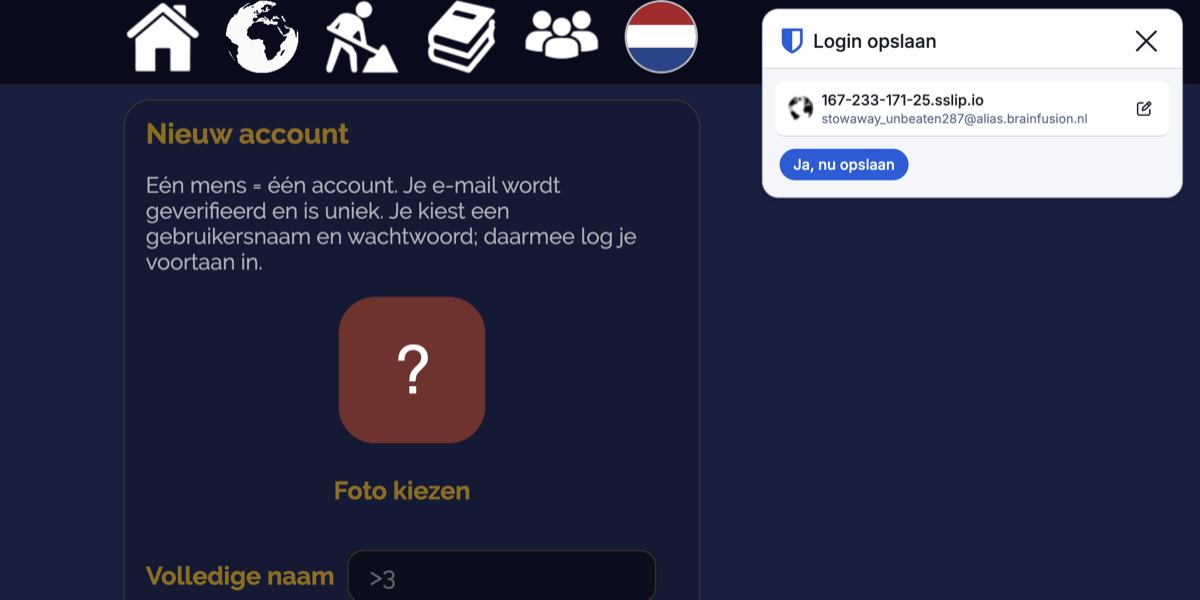
⚠️ Save only once. On subsequent pages (confirmation, email verification), Bitwarden again offers “Save login” — click away (×) next time, otherwise you will get duplicate entries.
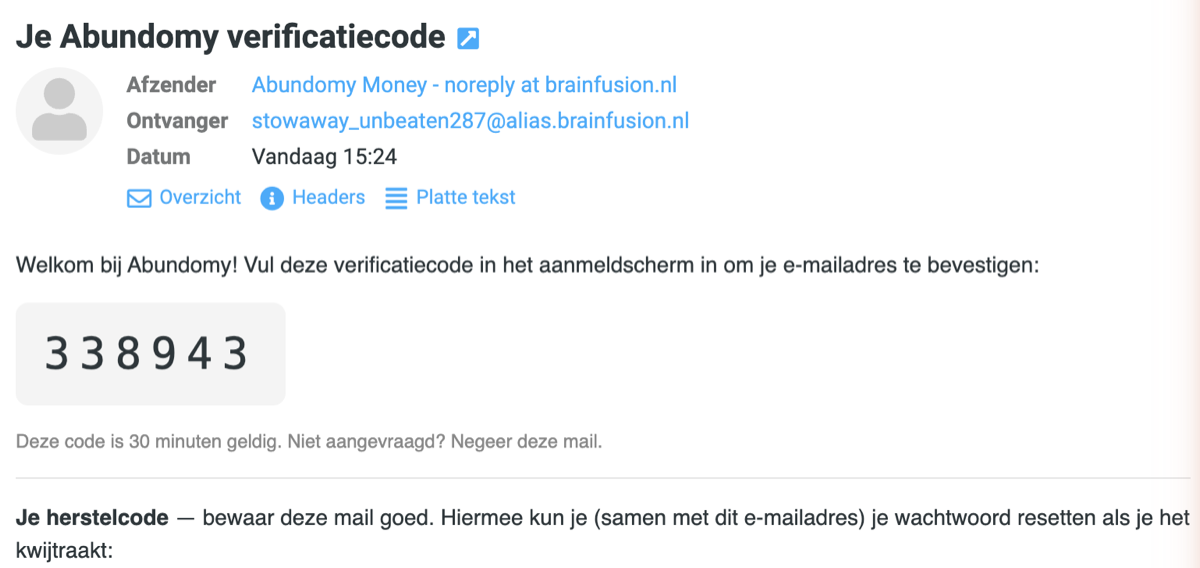
Received: anything that comes to your alias will simply appear in your inbox — with the original sender.
Anonymous answers: just click Reply. Your response will be returned as the alias — your real address will remain hidden (even if your mail program shows your own address when composing it).
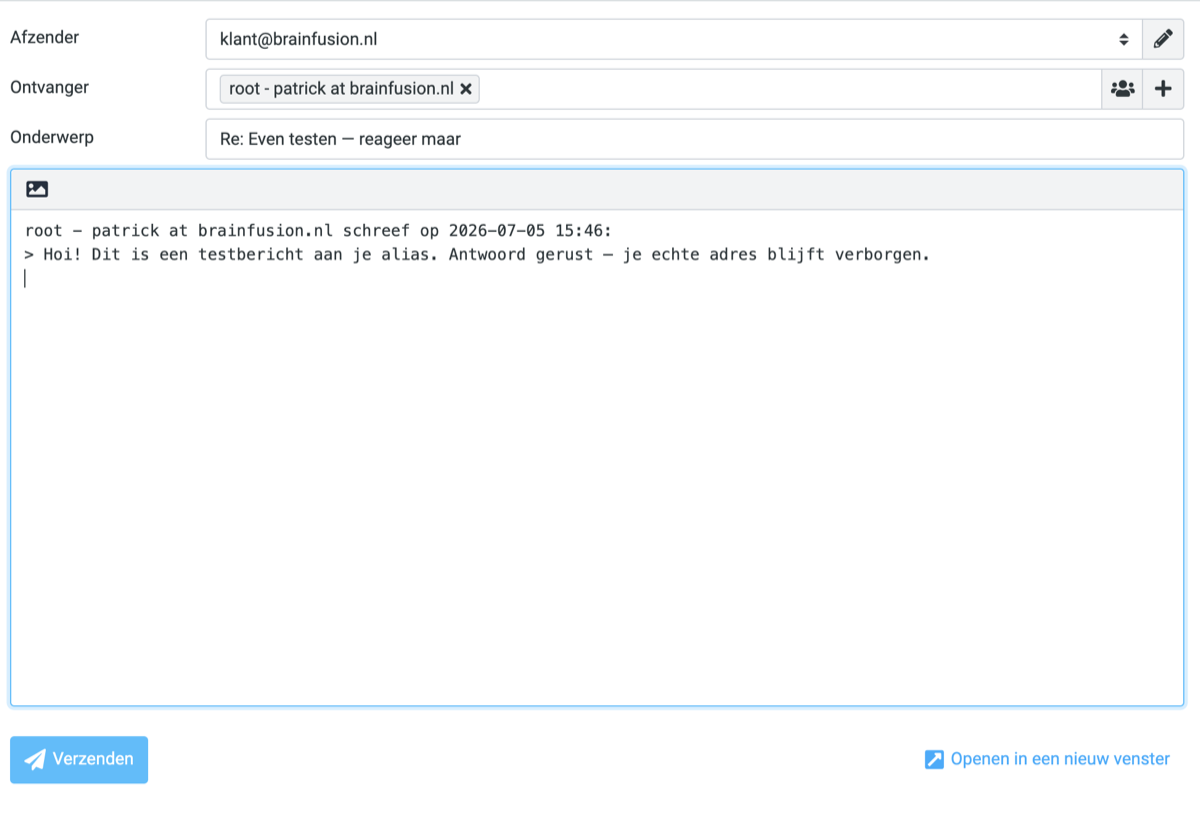
Save every login in your vault (including webmail and SimpleLogin)
When you first log in somewhere, your vault for that site is still empty (“no items to display”) — that’s normal. Just log in; then Bitwarden offers “save?” → Yes. So do not use the “+ Login” button before you have logged in.
From then on, your safe will automatically fill in your password — you won’t have to type or paste anything anymore (even with an extra password check, such as SimpleLogins security mode).
⚠️ Sequence pitfall: you logged in to webmail (Step 1) and SimpleLogin (Step 5) before the link was available — so those two are not yet in your vault. Save them anyway (log in again → “save?” → Yes).
Step 6b — The ARCA desktop app (optional)
Do you want your safe in its own app? The ARCA desktop app (currently for macOS; Windows and Linux follow) talk directly to vault.brainfusion.nl — same vault, same encryption, in one click in your dock. With built-in password generator, live 2FA codes, secure sharing (Sends) and a vault health report that identifies weak or reused passwords.
Log in with your master password (or your PIN), then everything — passwords, aliases, codes — can be copied with one click. The app has the same functions as the web vault and works alongside the browser extension.
Step 7 — Manage your aliases
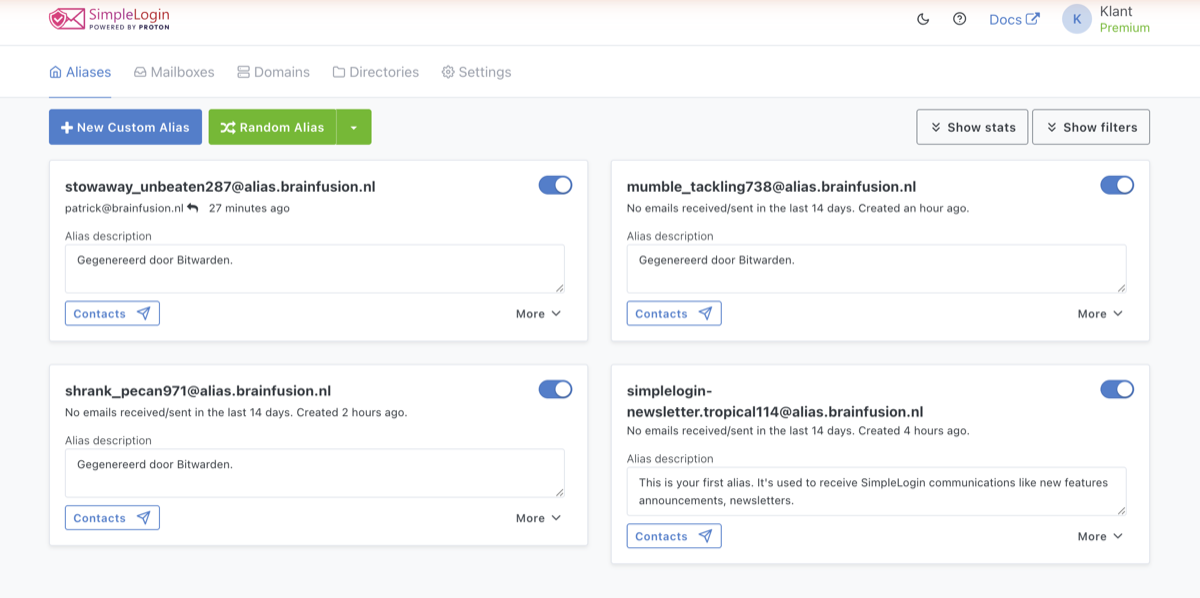
All your aliases are listed https://sl.brainfusion.nl (Aliases tab). By alias: on/off switch (spam on one alias = one click away; your real address remains clean), activity, description, Contacts and More (including removal). You can also create an alias yourself: “Random Alias” or “+ New Custom Alias”.
Step 8 — 2FA: Your vault is also your authenticator (bonus)
For two-factor authentication services, your vault can generate the 6-digit codes — no need for a separate Google/Microsoft app. Enable 2FA (TOTP) for the service (QR + secret key):
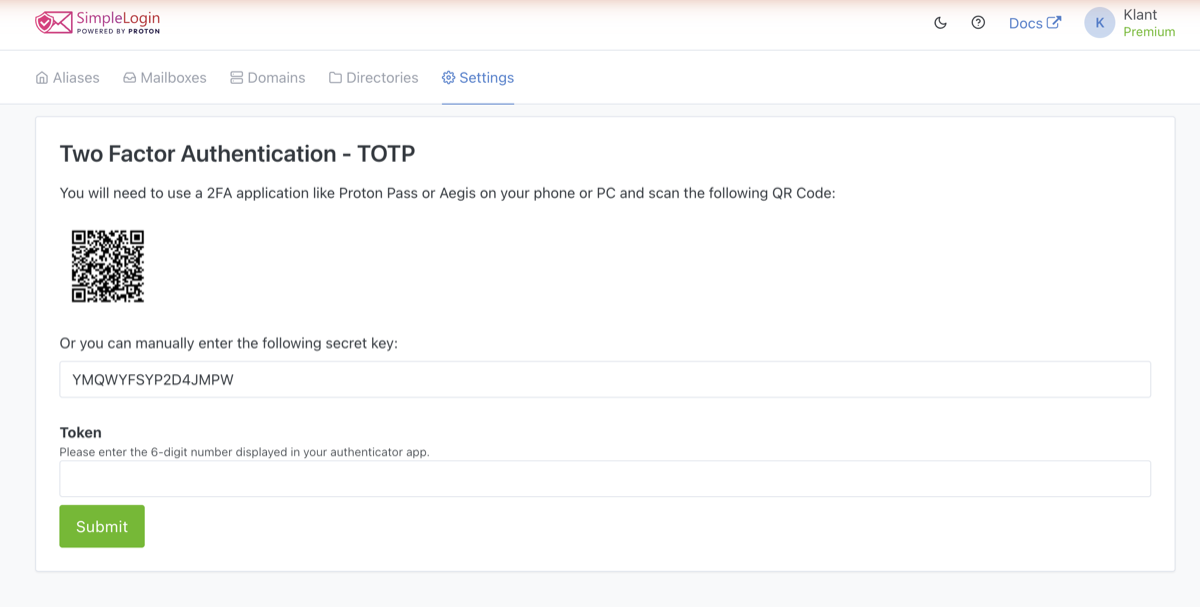
In Bitwarden, open the login of that service → Edit → paste the key into “Authenticator Key (TOTP)” → Save. Bitwarden now shows a rotating code; fill it in at the service to confirm 2FA.
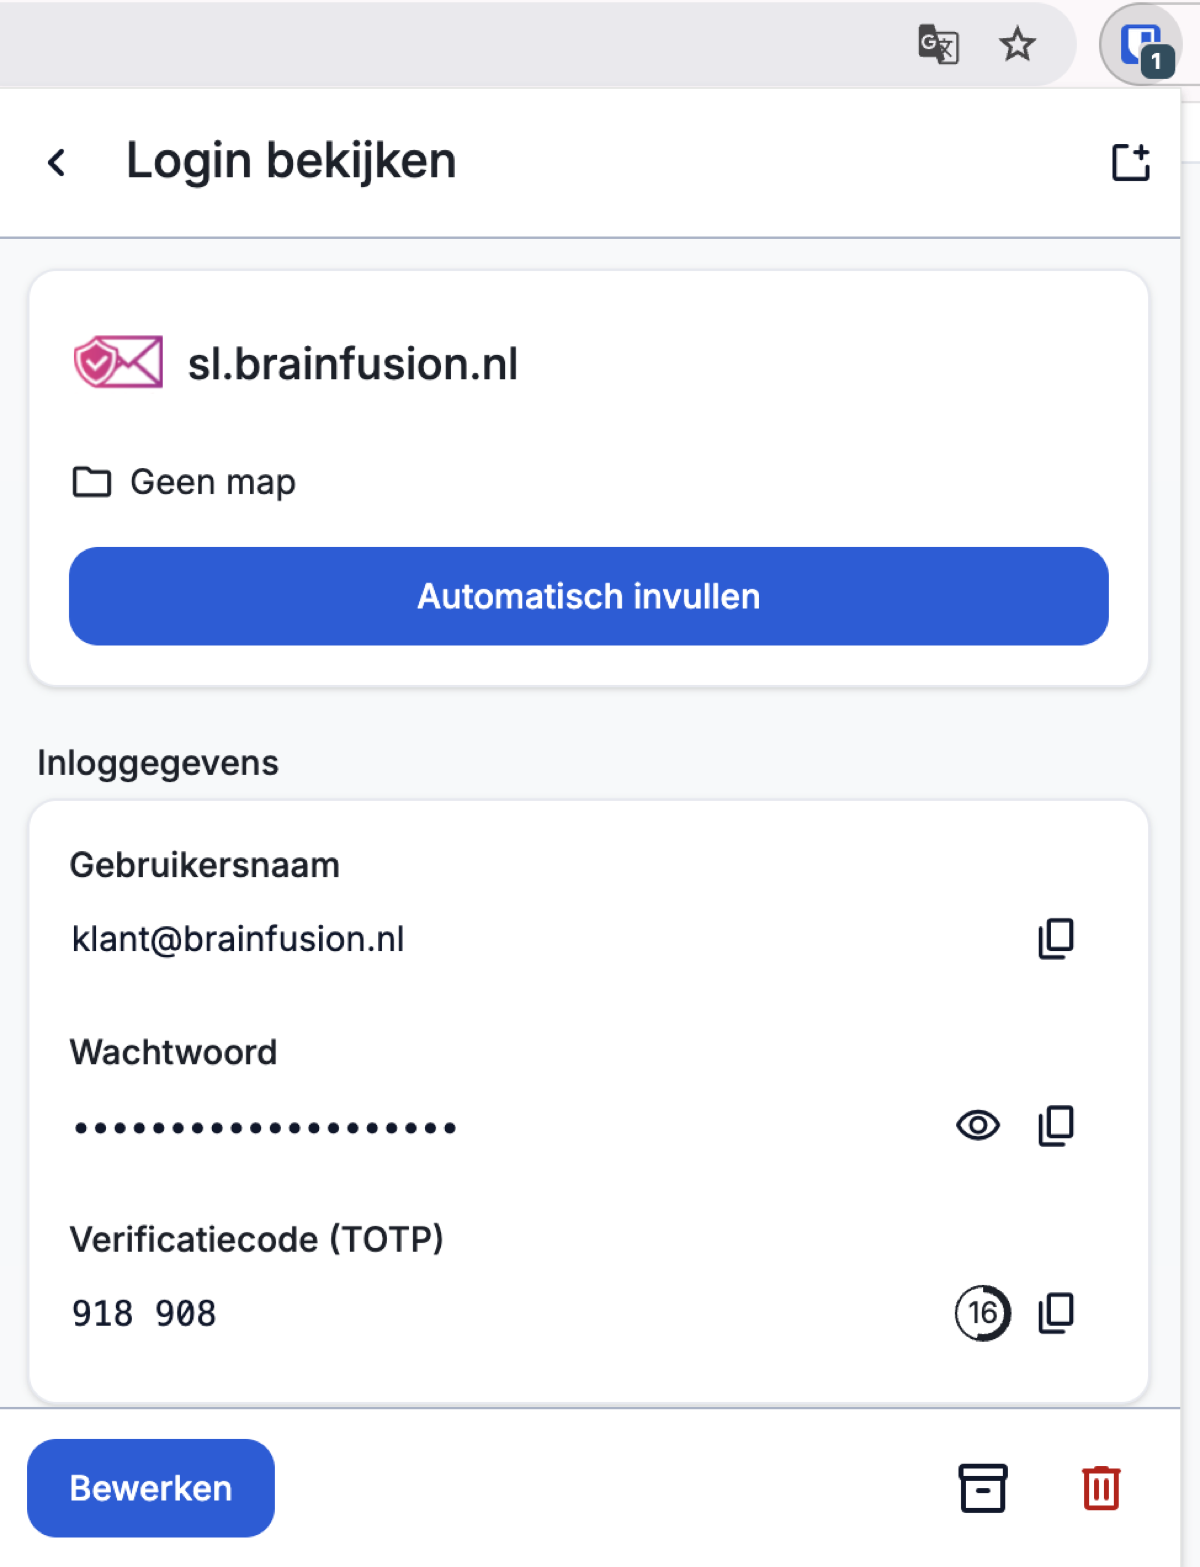
Honestly: having codes in the same safe is very useful, but not the same as “two separate factors in two places”. Your own 2FA key is secret — never share it.
Backup & restore your vault
No one can reset your master password → create a safety net yourself: Bitwarden → Tools/Tools → Export Vault → “Password Protected”, with a separate password (not your master). Keep the file safe and separate.
Switching from another password manager (migration)
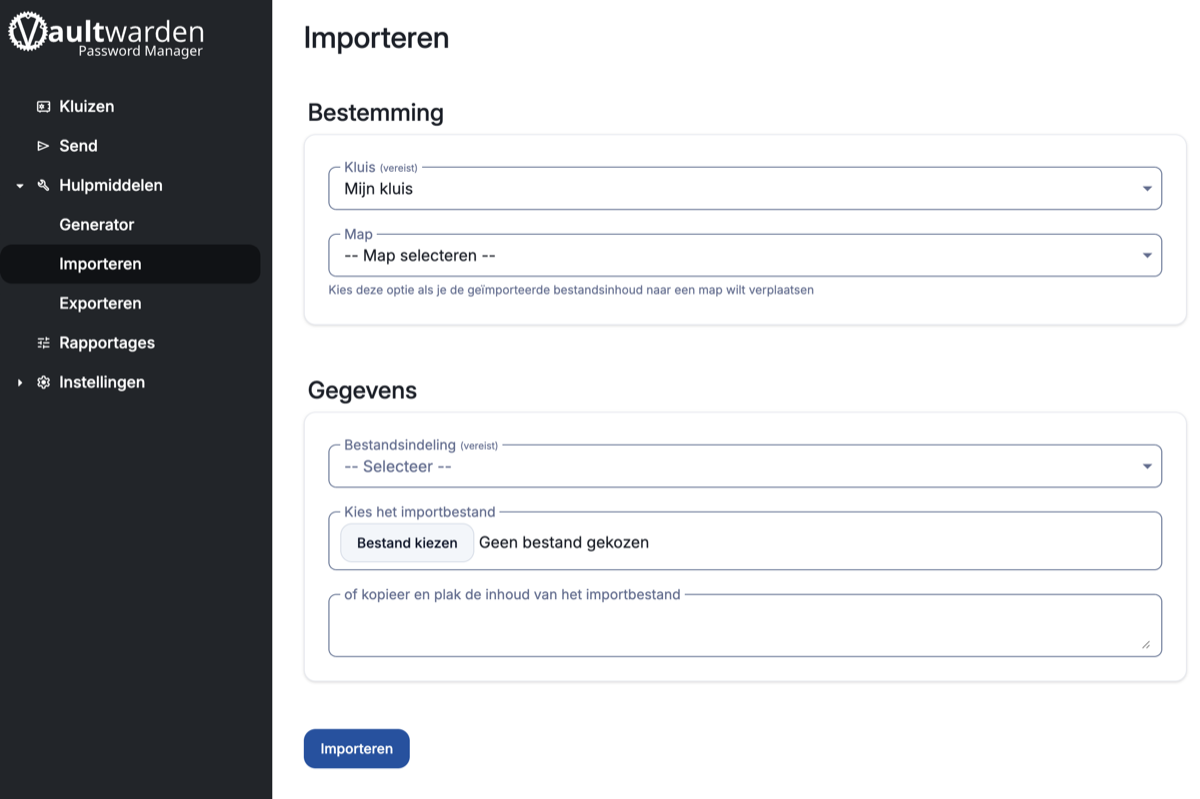
Do you already have passwords? Take them with you as a conscious step: export them from the old source, and import them into the web vault (vault.brainfusion.nl → Tools → Import). Delete the (usually plain text) export file immediately after the import. Then turn off the old source.
Important: You can import and restore the Recycle Bin in the web vault or desktop app — the browser extension does not have that. Accidentally deleted something? Web Vault → Recycle Bin → Restore (up to 30 days).
A few useful tips
- Let your safe do the work. Generate your alias and password in the field and save — never generate and copy separately. Don’t think about it too much; this is the easiest way to work.
- Turn off your browser’s password storage. Your safe is the only source — then nothing gets messed up. The extension will automatically indicate this to you with a red message.
- Not every red is an alarm. Some notifications are just “getting started” tips (like downloading the app) — you can skip those.
- Bonus: your vault is also your authenticator. For sites with two-step verification, your vault generates the codes — no need for a separate Google or Microsoft app.
- Would you rather have an app on your computer? Currently there is no support for AnonMail as we have in the browser extension. Management is limited to Vaultwarden and SimpleLogin, which are hosted securely on the Brainfusion server. We advise to NOT to use the Bitwarden app if you also want to use AnonMail.
- Email in your own email program? Do you want to set up your @brainfusion.nl mailbox in a mail client? You can make the necessary settings request from us.
💙 Ready to get started?
Order the bundle and you will receive your login details directly by email. Then slowly go through the steps above — we will personally guide you through them if you get stuck somewhere.
Stuck or have a question? Send us a message — then we will help you through it.
More about the service? Back to MyAnonMail.
Your email details (manual or automatic)
You don’t need to install a mail program to use MyAnonMail — your webmail works in any browser mail.brainfusion.nl. Do you still want your mailbox in an email program or on your put the phone? These are the details:
| Incoming (IMAP) | mail.brainfusion.nl · port 993 · SSL |
| Outgoing (SMTP) | mail.brainfusion.nl · port 587 · STARTTLS |
| Username | your full address, for example klant@brainfusion.nl |
| Password | the password from your first email |
Autofill:
- Thunderbird (Linux, Windows, macOS) and K-9 Mail (Android) — fills in everything yourself: autoconfig file (you only enter your address and password).
- Apple (iPhone, iPad, Mac Mail) — download it Apple profile and open it; the server settings are already included.
You always enter your password yourself — this is for security reasons never in a profile or autoconfig file.